Is your once-trusty garage door acting a little jerky these days? Maybe it’s not closing all the way, or it seems to be struggling to open. Don’t worry, you might be able to coax it back to smooth operation with a few simple adjustments to your LiftMaster garage door opener.
Related Article: A Guide to Boosting Your Home Value With a New Garage Door
In this article, we’ll walk you through the process of adjusting your LiftMaster garage door opener so your garage door opens and closes like a champ once again. We’ll also cover how to adjust the settings to make sure the door closes properly and stays down when required. Remember, for specific adjustment procedures and important safety information, always refer to the owner’s manual for your particular LiftMaster garage door opener model.
Preparing Your Garage Door Opener
Before you begin adjusting your LiftMaster garage door opener, it’s essential to prepare properly:
Consult the Owner’s Manual
Each LiftMaster garage door opener model has specific adjustment procedures. Refer to your owner’s manual for detailed instructions and safety guidelines. If you’ve misplaced it, you can often find a digital copy on the Chamberlain Group website.
Gather Your Tools
You’ll need a ladder to access the adjustment screws on the opener unit. Make sure you have a screwdriver and possibly a flashlight to see the components clearly.
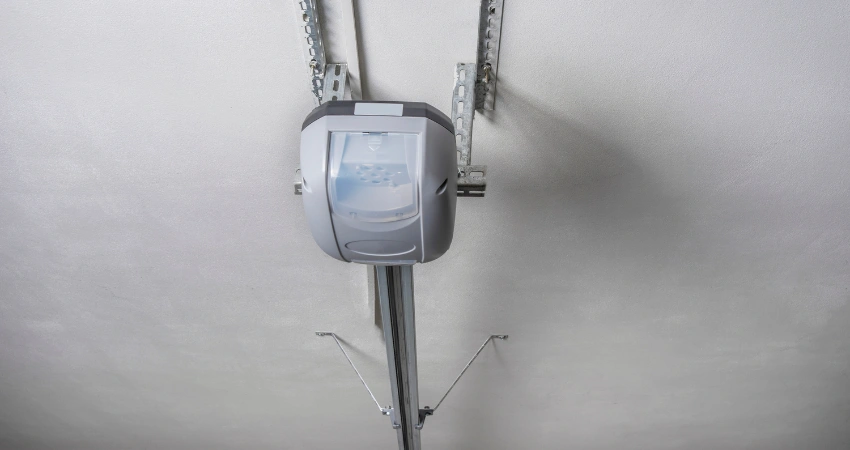
Familiarize Yourself with the Components
Understand the layout of your garage door opener. Key parts include the limit switch, adjustment screws, and the motor. Knowing these parts will make the adjustment process smoother. It is also important to understand the components of garage doors for safety and optimal performance.
Adjusting Your Garage Door Opener
Setting Travel Limits for Your Garage Door
One of the first adjustments you might need to make is setting the travel limits. This makes sure your garage door opens and closes properly.
Adjusting the Down Position
If your garage door doesn’t close completely or reverses when it touches something, you need to adjust the down position.
- Measure the distance your door needs to travel to close completely.
- Turn the “down” adjustment screw counterclockwise to increase the travel distance. Remember, one full turn equals 2 inches (5 centimeters) of travel distance.
- Fine-tune the adjustment until the door closes properly.
Fine-Tuning the Up Position
Similarly, adjust the up position if your door doesn’t open fully.
- Turn the “up” adjustment screw to lengthen or shorten the travel distance.
- Test the door’s operation by pressing the remote control and making necessary adjustments.
Fine-Tuning the Force and Sensitivity
Adjusting the force and sensitivity of your garage door opener is crucial to prevent damage and guarantee safety.
Adjusting the Closing Force
The door should land tightly against the ground without bouncing back.
- Locate the force adjustment screws on the opener unit.
- Turn the screws to adjust the force as needed.
- Use the remote control to test the door’s operation. The door should close smoothly and stay shut.
Adjusting the Opening Force
If the door struggles to open or stops midway, the opening force might need adjustment.
- Similar to the closing force, adjust the screws until the door opens smoothly without resistance.
Troubleshooting Common Issues

Even with proper adjustments, you might encounter some common issues with your LiftMaster garage door opener. Here’s how to troubleshoot:
- Check the Power Source: Make sure the opener is plugged in and the power source is functioning correctly.
- Inspect the Alignment and Balance: A misaligned or unbalanced garage door can cause operational issues. Check that the door is properly aligned and balanced.
- Examine the Sensors and Tracks: The sensors should be clean and aligned. Inspect the tracks for any damage or obstructions.
- Consult the Manual or Contact Support: If problems persist, refer to the owner’s manual or contact LiftMaster customer support for professional help.
Additional Tips and Tricks for Your Garage Door Opener
To further guarantee your LiftMaster garage door opener remains in top shape, here are some additional tips and tricks:

- Regularly Inspect and Clean the Tracks: Dirt and debris can accumulate in the tracks over time, causing the door to operate less smoothly. Regularly inspect and clean the tracks to keep them free of obstructions.
- Lubricate Moving Parts: Use garage door lubricant on the rollers, hinges, and tracks to make sure they move smoothly. Avoid using heavy grease, as it can attract more dirt.
- Check the Balance of Your Garage Door: An unbalanced garage door can strain the opener. Disconnect the opener and manually lift the door halfway. If it stays in place, it’s balanced. If it falls, you need to adjust the balance.
- Monitor the Door’s Operation: Listen for any unusual sounds when the door is operating. Squeaking, grinding, or banging noises can indicate that something is wrong and needs attention.
- Replace Worn-Out Parts: Over time, parts like springs, cables, and rollers can wear out. Regularly inspect these parts and replace them if necessary to prevent further damage.
- Keep the Remote Control Batteries Fresh: Weak batteries can affect the performance of your remote control. Replace the batteries regularly to make sure it works efficiently.
- Secure the Opener Unit: Make sure the opener unit is securely mounted and not vibrating excessively during operation. Loose mounting can affect performance and cause noise.
Understanding Limit Switch and Adjustment Screws
The limit switch and adjustment screws are crucial components of your LiftMaster garage door opener. Here’s a closer look at their roles and how to adjust them:
- Limit Switch: The limit switch determines how far the door travels when opening and closing. If your door doesn’t open or close completely, adjusting the limit switch can solve the problem.
- Adjustment Screws: These screws allow you to fine-tune the travel limits and force settings.
- Up and Down Adjustment Screws: These control the travel limits. Adjust these screws to change how far the door opens or closes.
- Force Adjustment Screws: These control the force required to open and close the door. If the door reverses direction or stops midway, adjusting these screws can help.
Common Mistakes to Avoid
When adjusting your LiftMaster garage door opener, avoid these common mistakes to guarantee a smooth operation:
- Over-Tightening Screws: Over-tightening the adjustment screws can cause the door to operate incorrectly. Make small adjustments and test the door after each change.
- Ignoring Safety Features: Modern garage door openers have safety features like auto-reverse. Make sure these features are working correctly to prevent accidents.
- Skipping Regular Maintenance: Regular maintenance is essential for the longevity of your garage door opener. Don’t skip inspections and lubrication.
- Not Testing the Door After Adjustments: Always test the door after making adjustments to make sure it operates smoothly. Use the remote control to test both the opening and closing functions.
Adjusting your LiftMaster garage door opener for smooth operation doesn’t have to be complicated. By following the steps outlined in this guide and paying attention to the key components like the limit switch and adjustment screws, you can ensure your garage door operates efficiently and safely. Regular maintenance and careful adjustments can extend the life of your garage door opener and provide you with peace of mind.
Garage Door Openers with Jolly Goat
Remember, if you’re ever in doubt or face complex issues, don’t hesitate to seek professional help from Jolly Goat. Your LiftMaster garage door opener is a crucial part of your home’s security and convenience, and keeping it in top condition is well worth the effort.
Contact us today with any LiftMaster or garage door questions, or to learn more visit our Garage Door Opener Information Center.