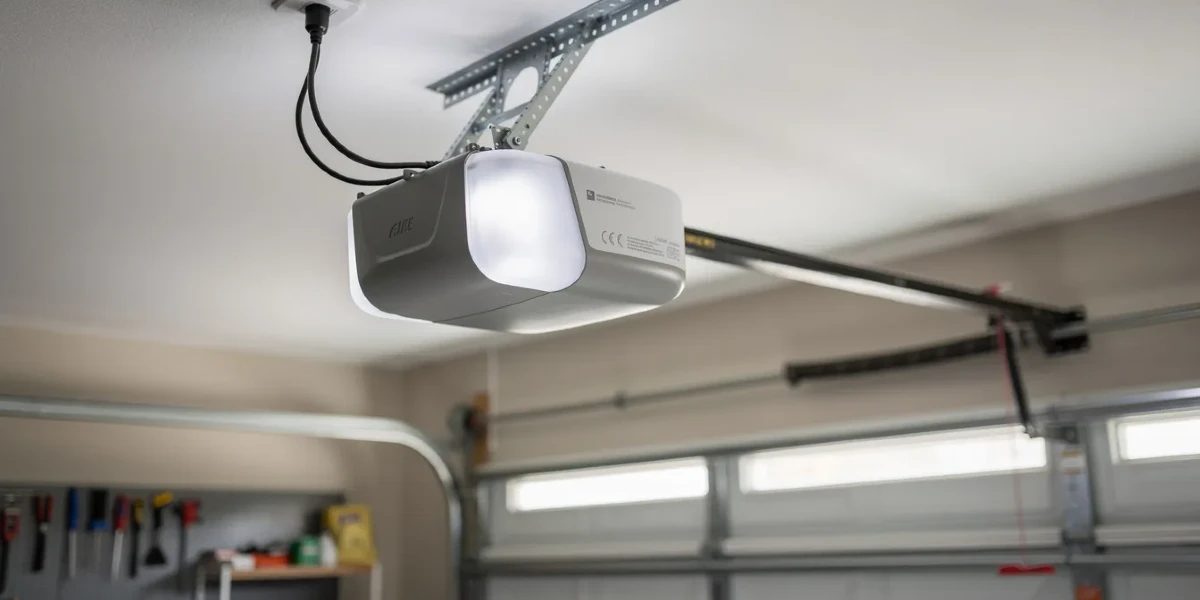

LiftMaster garage door openers are great—until the remote goes radio silent, the keypad gets rude, the opener starts a beep concert, or the door needs a pep talk; this guide, in plain goat-approved language, covers the usual fixes: opener parts, changing keypad codes, pairing remotes, clearing old access, syncing HomeLink, swapping batteries, and tweaking travel or force for smoother movement. Models vary (Learn button color, remote/keypad type, and manual vs electronic adjustments), so check your owner’s manual before you poke around—garage doors love keeping things interesting. If a reset, new battery, or a few button presses won’t do it, the Jolly Goat Garage Doors team can hoof it over and get your door behaving again.
Jump to a section
- Know Your LiftMaster Opener Parts
- How Do I Change the Code on My Opener?
- Pair LiftMaster Opener Remotes
- When Should You Reset or Clear the Opener Memory?
- Sync Your Opener With Your Car
- Changing the Battery in Your Opener
- Adjust Your Opener for Smooth Operation
- Simple Maintenance Tips
- When to Call a Jolly Professional
- Need Help With Your LiftMaster Opener?
Know Your LiftMaster Opener Parts Before You Start
Before you start pressing buttons and wondering if your garage door opener is secretly testing you, it helps to know the main parts of the system.
- Motor Unit: This is the main opener body that houses the motor and controls. Most standard LiftMaster openers are mounted near the ceiling, while some wall-mount models are installed beside the garage door.
- Remote Control: This is the handheld wireless accessory used to open and close the garage door after it has been programmed to the opener.
- Keypad/Keyless Entry: This is the optional exterior keypad that lets you open the garage door with a PIN. Handy when you do not have the remote, and extra handy when everyone remembers the code.
- Wall Control Panel / Door Control: This is the indoor wall-mounted button or panel used to operate the opener from inside the garage. Depending on the model, it may also control the opener lights, lock mode, programming, or myQ features.
- Safety Reversing Sensors: These are the sensors located on both sides of the garage door opening near the floor. They help stop the door from closing when something blocks the sensor beam.
- Learn/Program Button: This is the important little button on the opener motor unit used to program remotes and keypads or clear old remote and keypad codes from the opener’s memory.
How Do I Change the Code on My LiftMaster Garage Door Opener?
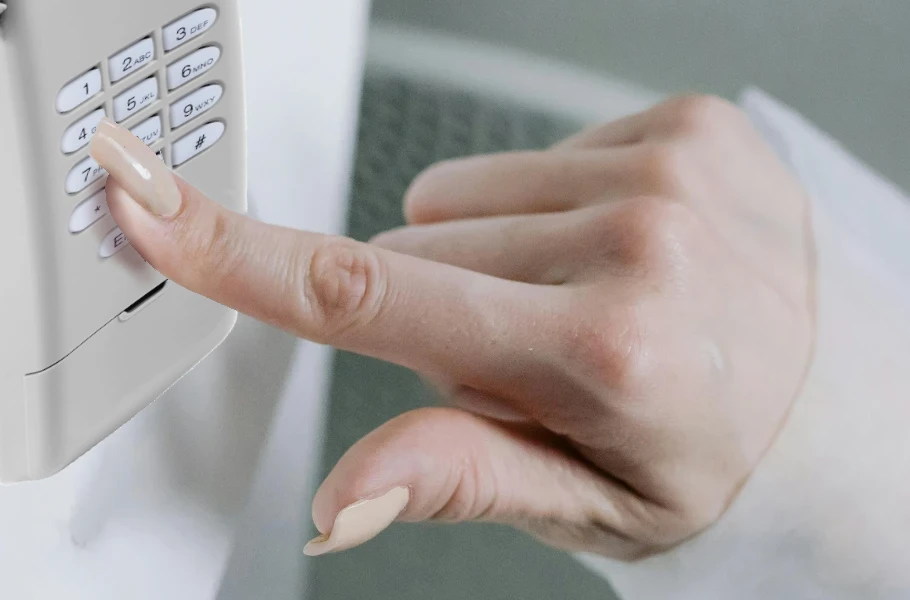
Changing the code on your LiftMaster garage door opener usually means changing the PIN on your wireless keypad—the little outside keypad that lets you open the garage door without a remote. It is a smart move if you recently moved in, shared the code with someone, forgot who has it, or just want a fresh security reset.
The exact steps can vary by keypad model, so check your LiftMaster manual when possible. But for many LiftMaster keypads, here is the goat-approved way to get it done.
If You Know the Current PIN
For many LiftMaster wireless keypads, if your keypad still works and you simply want to change the code:
- Enter your current PIN on the keypad.
- Hold the # key until the opener confirms the change, usually with two light blinks.
- Enter your new 4-digit PIN.
- Press Enter.
- Test the new PIN by entering it and pressing Enter again.
If the door opens, you are all set. Your garage door has officially accepted its new secret handshake.
If You Forgot the Current PIN
If you do not know the old PIN, you may need to reprogram the keypad through the opener’s Learn button.
- Locate the Learn button on the garage door opener motor unit. It is usually near the antenna wire or behind the light cover.
- Press and release the Learn button. Do not hold it down.
- Enter your new 4-digit PIN on the keypad.
- Press and hold Enter until the opener lights blink or you hear two clicks.
- Test the new PIN.
Important little garage-door warning: holding the Learn button too long can erase your programmed remotes and keypads. Press and release it when programming. Only hold it down if you intentionally want to clear old access codes.
If You Want to Clear All Old Codes
If you moved into a new home, lost a remote, or want to remove old access completely, you can erase the opener’s memory.
Press and hold the Learn button until the Learn LED turns off, usually about 6 seconds. This clears old remote-control and keypad codes. After that, reprogram only the remotes and keypad PINs you want to keep using.
Tips for Choosing a Better PIN
Choose a 4-digit PIN that is easy for your household to remember but hard for others to guess. Skip the greatest hits like 1234, 0000, your street number, or your birthday. Your garage deserves better than a code that practically waves at strangers.
Quick Troubleshooting
If the new PIN does not work, try these quick checks:
- Make sure you entered the PIN within the programming window.
- Replace the keypad battery if the keypad is dim or unresponsive.
- Confirm you pressed and released the Learn button instead of holding it.
- Check that your keypad is compatible with your LiftMaster opener.
- Reprogram the keypad using the instructions for your specific model.
If your keypad still refuses to cooperate after fresh batteries and reprogramming, Jolly Goat Garage Doors can help take the guesswork out of it. Sometimes the issue is the keypad, sometimes it is compatibility, and sometimes the garage door is just being a little too mysterious for a DIY afternoon.
Step-by-Step Guide to Pair LiftMaster Garage Door Opener Remotes
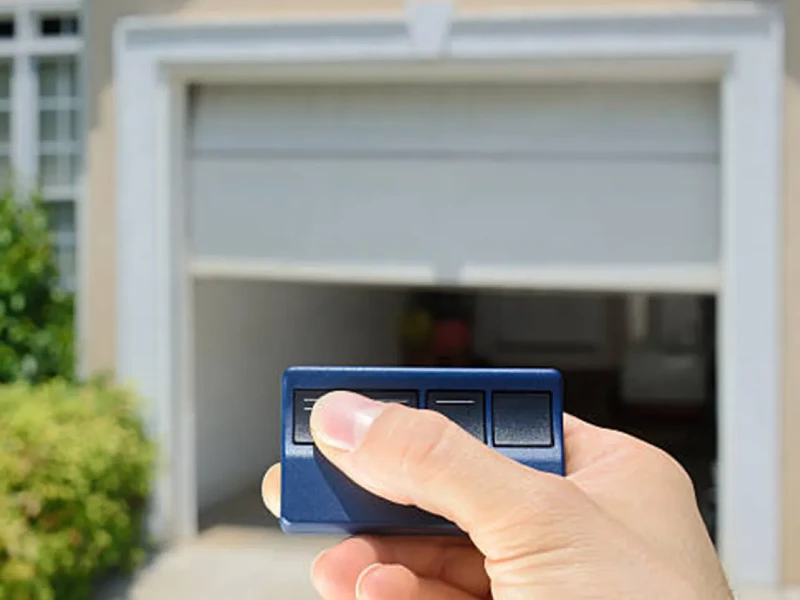
Pairing a LiftMaster garage door opener remote is usually a quick little garage win. No dramatic toolbox moment required. Just your remote, your opener, a safe ladder, and a few button presses in the right order.
Before you start, one important note: LiftMaster remote programming can vary by opener model and remote type. Some remotes pair with a simple Learn-button process, while MAX remotes, such as the 890MAX, 893MAX, and 895MAX, have their own programming steps. So, if your remote has a model number on the back, give it a quick peek before you begin. Your garage door opener manual is also your best friend here—maybe not a fun friend, but definitely a useful one.
What You’ll Need
Before pairing your LiftMaster remote, gather:
- Your LiftMaster garage door opener remote
- Access to the garage door opener motor unit
- A sturdy ladder
- A flashlight if the opener area is dim
- Your remote model number, if available
- Your opener manual, if available
Safety first, goat friends: keep people, pets, vehicles, bikes, and mystery garage clutter away from the door while programming. The garage door may move during testing.
Step 1: Make Sure the Remote Is Compatible
Before pressing any buttons, make sure your remote is compatible with your LiftMaster opener.
A helpful way to check compatibility is by looking at the color of the opener’s Learn button. LiftMaster openers may have a yellow, purple, red/orange, or green Learn button, and that color helps determine which remotes and keypads will work with the opener.
If the remote is not compatible with your opener, it will not pair no matter how nicely you ask it. Garage doors are helpful, but they are not known for negotiating.
Step 2: Locate the Learn Button
Find the Learn button on your LiftMaster garage door opener motor unit. It is usually located on the back, side, or right side of the opener, often near the hanging antenna wire. On some models, it may be behind the light cover.
The Learn button may be yellow, purple, red/orange, or green, depending on the opener model.
Use a sturdy ladder if you need to reach the opener, and do not stand on chairs, boxes, coolers, or anything that looks like it was not built for climbing. We like brave. We do not like wobbly.
Step 3: Press and Release the Learn Button
Press and release the Learn button on the opener.
Do not hold it down. Holding the Learn button for several seconds can erase programmed remotes and keypads from the opener’s memory.
After you press and release the Learn button, the Learn LED should turn on. You usually have about 30 seconds to complete the next step.
Step 4: Press the Button on the Remote
While the opener is still in programming mode, press the remote button you want assigned to that door.
Release the button once the opener gives its confirmation signal, such as a light flash or click. That flash or click is the opener’s way of saying, “Got it.” Release the remote button once the opener confirms programming.
Step 5: Test the Remote
Step away from the ladder and stand in a safe spot where you can see the garage door clearly.
Press the programmed remote button. If the garage door opens or closes, congratulations—your LiftMaster remote is paired and ready to roll.
If the door does not move, try the steps again. Make sure you are pressing and releasing the Learn button, using a compatible remote, and pressing the remote button within the 30-second programming window.
What If You Have a LiftMaster MAX Remote?
Some LiftMaster remotes, including the 890MAX, 893MAX, and 895MAX, may require a few extra steps before they pair with the opener.
For these remotes, you typically need to place the remote into programming mode first, choose the correct opener type using the remote button sequence, then press and release the opener’s Learn button and finish pairing.
Because the exact button sequence can vary by remote model and opener technology, follow the instructions for your specific MAX remote. Once the remote is set for the correct opener type, you can complete the pairing at the garage door opener.
When Should You Reset or Clear Your LiftMaster Opener Memory?

Resetting a LiftMaster opener usually means clearing old remote and keypad codes from the opener’s memory. It is a handy step when you want to control who can open your garage door—because your garage should not be accepting mystery guests.
Here are the most common reasons to clear the opener’s memory:
- Lost or Stolen Remote Controls: If a remote is missing, clearing the opener’s memory keeps that remote from opening your garage door. Afterward, you can reprogram only the remotes you still have.
- New Home Purchase: If you just moved in, clearing old remote and keypad codes is a smart security step. That way, previous owners, contractors, or old spare remotes no longer have access.
- Old Keypad Codes: If you do not know who has the keypad PIN, clear the old codes and set up a fresh one. New home, new code, no garage-door guessing game.
- Starting Fresh With Remotes and Keypads: If your opener has too many old accessories programmed, clearing the memory lets you start over and add back only the devices you actually use.
- Remote or Keypad Troubleshooting: If a remote or keypad will not connect, clearing and reprogramming can sometimes help. Just remember, this will not fix mechanical issues, sensor problems, door balance issues, wiring trouble, or a failing opener part.
Clearing All Remote Controls from Your Opener’s Memory
If a remote was lost, stolen, or left with someone who no longer needs access, you may want to clear the opener’s memory and start fresh.
To erase remote and keypad access, press and hold the Learn button until the Learn LED turns off. This usually takes about 6 seconds. Once the LED turns off, the previous remote-control and keypad codes are erased.
After clearing the memory, reprogram only the remotes and keypads you want to keep using.
Friendly warning from the goat pen: do not clear the memory unless you are ready to reprogram your devices. Once the old codes are gone, those remotes and keypads will not work again until they are paired.
What Steps Should I Follow to Sync My LiftMaster Garage Door Opener With My Car?
Syncing your LiftMaster garage door opener with your car is one of those little upgrades that makes daily life feel smoother. No more digging around for the remote, no more “where did I put that thing?” moments, and no more garage-door juggling act while you’re trying to pull into the driveway.
For many vehicles, this is done through HomeLink, the built-in garage door opener system found in many cars, trucks, and SUVs. Some vehicles may call it a built-in garage door opener button or universal transmitter, but the idea is the same: your car learns the signal from your existing LiftMaster remote, then connects to the opener.
The exact steps can vary by vehicle and opener model, so keep your vehicle owner’s manual and LiftMaster manual nearby. Think of them as your garage door trail map—less exciting than a treasure map, but much more useful when your garage door is involved.
Why Sync Your LiftMaster Garage Door Opener to Your Car?
Pairing your LiftMaster opener with your vehicle can make coming and going a whole lot easier. Once it is programmed, you can:
- Open and close your garage door from inside your vehicle
- Avoid carrying a separate garage door remote
- Keep your opener button in one easy-to-reach place
- Reduce the risk of losing a handheld remote
- Make daily garage access feel a little more modern and convenient
It is a small setup step with a big “well, that’s handy” payoff.
Before You Start
Before programming your vehicle, take a minute to prep the area. Park your vehicle outside the garage, not directly under the door. Keep people, pets, bikes, tools, and anything else you like in one piece away from the garage door. During programming, the door may move.
You will also want to have:
- Your working LiftMaster handheld remote
- A fresh battery in the remote, if possible
- A sturdy ladder, if you need to reach the Learn button
- Your vehicle owner’s manual
- Your LiftMaster opener manual
Do not stand on your vehicle to reach the opener. Your garage door opener may be tough, but your car roof was not designed to be a stepladder.
Where Is the HomeLink Button in Your Car?
HomeLink buttons are usually located in one of three places:
- On the rearview mirror
- On the sun visor
- On an overhead console or built-in module
Look for the HomeLink logo or three small programmable buttons. If you do not see them, check your vehicle manual. Some vehicles use a similar built-in transmitter system that may have slightly different instructions.
HomeLink vs. a Built-In Garage Door Button
Many “built-in garage door opener buttons” in vehicles are actually HomeLink buttons. HomeLink is a built-in wireless system that can control garage doors, gates, and other compatible devices.
Some vehicles may use a different built-in transmitter, so the setup process can vary. When in doubt, follow your vehicle manual first, then use the LiftMaster opener manual for the garage-door side of the process. For most HomeLink-equipped vehicles, the process works like this:
- Train the HomeLink button using your existing LiftMaster remote.
- Press the Learn button on the LiftMaster opener.
- Return to the vehicle and finish rolling-code programming.
How to Sync Your LiftMaster Garage Door Opener With Your Car’s HomeLink System
Start With the Vehicle Parked Outside the Garage
Park outside the garage and make sure the garage door area is clear. This keeps everyone safe in case the door moves during programming.
Choose the HomeLink Button You Want to Program
Pick one of the available HomeLink buttons in your vehicle. If the vehicle is new to you, or if you want to erase old programming, you can clear the HomeLink memory first.
To clear old HomeLink programming, hold the two outside buttons until the indicator light changes pattern. This usually takes about 10 seconds.
Important note: clearing HomeLink memory can erase all programmed HomeLink buttons, not just the garage door button. If you already have gates or another garage door programmed, skip the full clearing step and reprogram only the button you want to use.
Train HomeLink With Your LiftMaster Remote
Place the handheld remote close to the HomeLink buttons, following your vehicle manual’s recommended distance.
Press and hold the HomeLink button you want to program and the button on your LiftMaster remote at the same time. Keep holding both buttons until the HomeLink indicator light changes from a slow blink to either a solid light or a rapid flash. Once the light changes, release both buttons.
Check the HomeLink Indicator Light
Press and release the programmed HomeLink button. If the indicator light stays solid and the garage door moves, you may be done. Give yourself a tiny victory bleat.
If the indicator light flashes rapidly and then turns solid, your LiftMaster opener likely uses rolling-code technology. That means you need to complete the next step using the Learn button on the opener.
Find the Learn Button on the LiftMaster Opener
Go to your LiftMaster garage door opener motor unit and locate the Learn button. It is usually near the antenna wire and may be under the light cover. Depending on the model, the button may be yellow, purple, red/orange, or green.
Use a sturdy ladder if needed, and do not climb on your vehicle or anything wobbly. Garage doors are great. Emergency room trips? Not so great.
Press and Release the Learn Button
Press and release the Learn button like a doorbell. Do not hold it down. Holding the Learn button too long can erase remotes, keypads, and other programmed accessories from the opener’s memory. After pressing and releasing the Learn button, you usually have a short window to complete the next step.
Return to Your Vehicle and Press HomeLink
Within about 20 seconds, return to your vehicle and press and release the programmed HomeLink button. You may need to repeat the press-and-release sequence up to three times. When programming is successful, the garage door should move.
Test the Connection
Once the door responds, test the HomeLink button again from inside your vehicle. Make sure the garage door opens and closes properly. If it works, congratulations. Your LiftMaster opener and your car are now officially on speaking terms.
What If HomeLink Will Not Program?
If the setup does not work on the first try, do not panic. HomeLink programming can sometimes take a few attempts, especially with rolling-code openers. Try these troubleshooting tips:
- Put a fresh battery in your LiftMaster handheld remote.
- Hold the remote at a different distance or angle from the HomeLink buttons.
- Make sure you are pressing and releasing the Learn button, not holding it down.
- Check that you are using a working LiftMaster remote.
- Make sure you return to the vehicle quickly after pressing Learn.
- Check your vehicle manual for model-specific instructions.
- Straighten the antenna wire hanging from the opener motor unit if range is weak.
- Avoid using non-approved LED bulbs in the opener, since some bulbs can interfere with radio signals.
If HomeLink keeps acting stubborn, Jolly Goat Garage Doors can help troubleshoot the opener side of the setup. We can check the Learn button, remote signal, opener compatibility, and anything else keeping your car and garage door from becoming best driveway buddies.
What Is the Process for Changing the Battery in a LiftMaster Garage Door Opener?
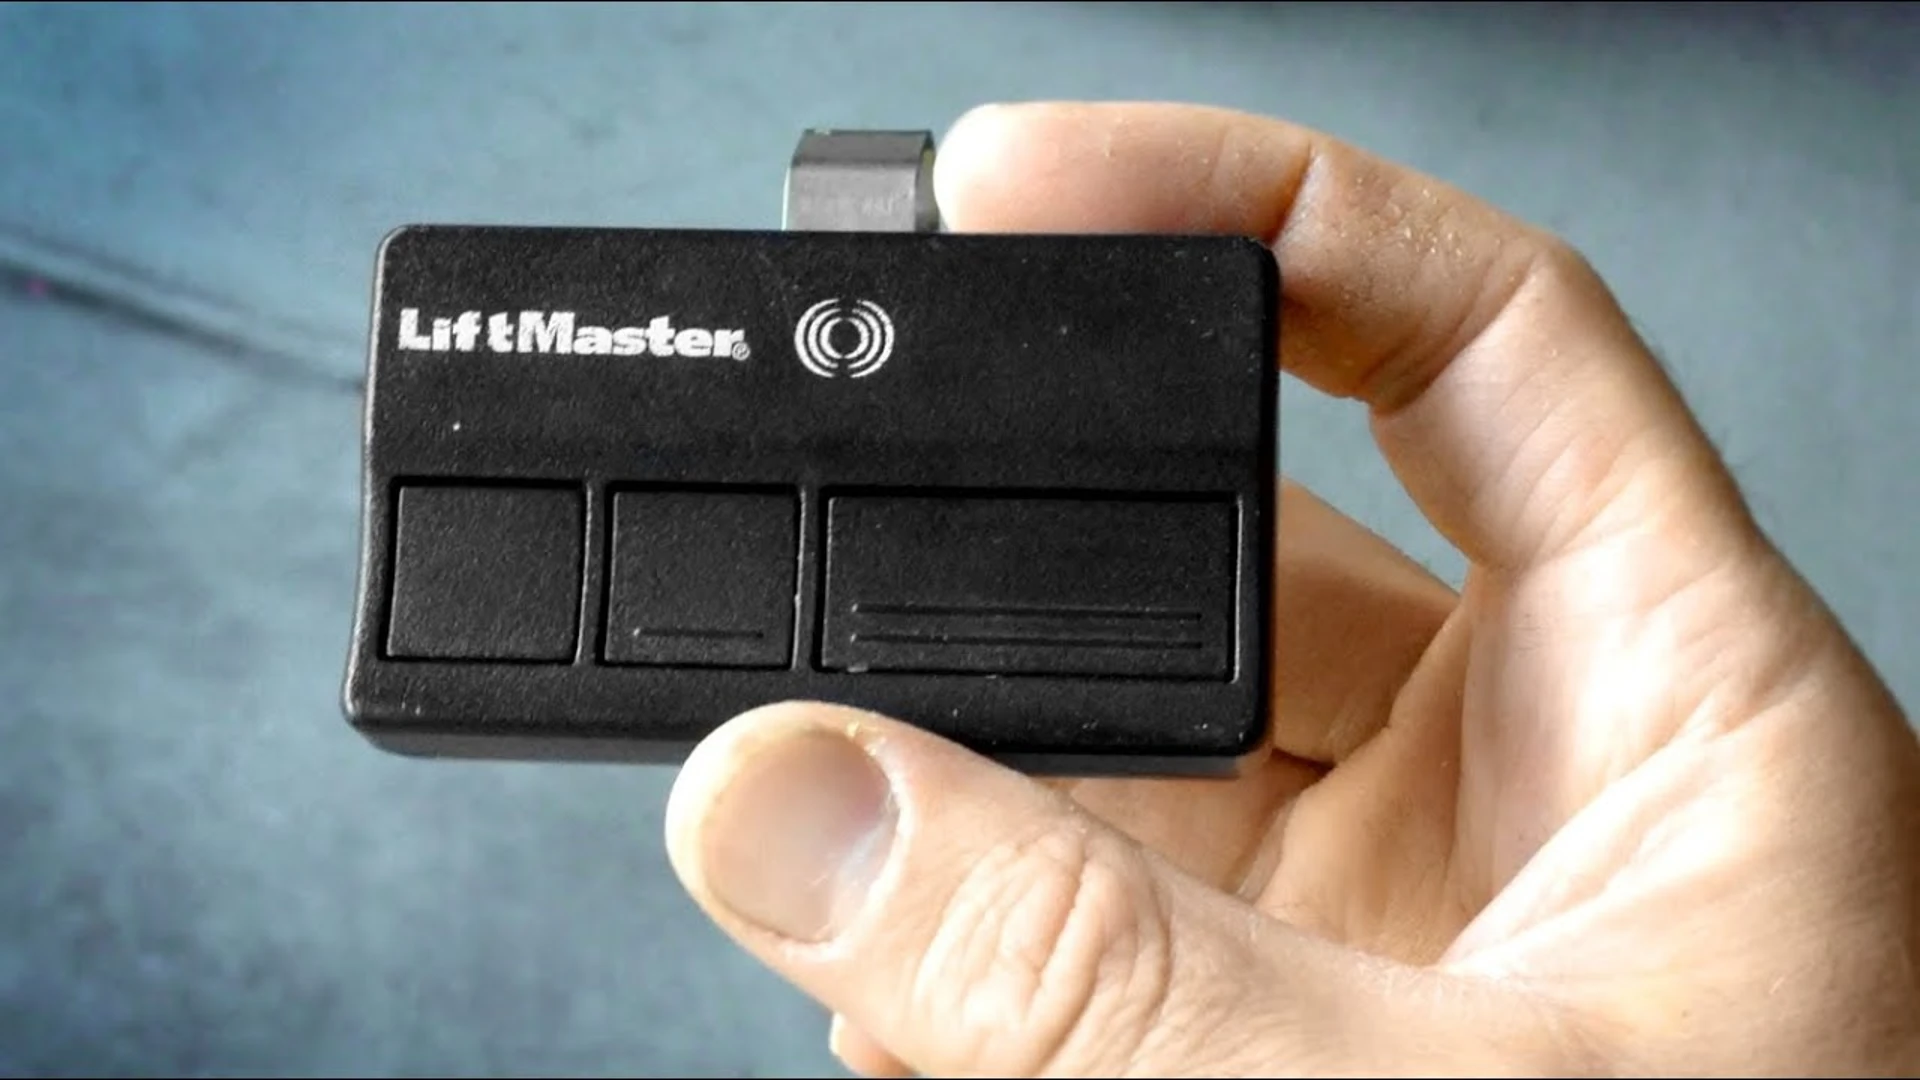
A LiftMaster garage door opener is one of those handy home helpers you do not think about much—until the power goes out, the opener starts beeping, or your remote suddenly stops doing its one important job. The good news? In many cases, replacing the battery is a pretty manageable task.
Before you grab a screwdriver and start your garage-door adventure, it helps to know which battery you are actually replacing. A LiftMaster opener may involve more than one battery type:
- The garage door opener backup battery, which helps certain opener models run during a power outage
- The handheld remote battery, which powers your remote control
- The wireless keypad battery, which powers the outside PIN pad
Tools and Materials Needed
- A compatible replacement battery for your LiftMaster model
- A screwdriver, usually Phillips or flat-head depending on the opener
- A sturdy step ladder
- Your LiftMaster owner’s manual or model number
Safety First, Goat-Approved
Before working on the opener, take a few safety steps:
- Close the garage door before starting.
- Disconnect power to the opener before opening the battery compartment.
- Keep children, pets, and curious bystanders away from the work area.
- Use a stable ladder and avoid reaching awkwardly.
- Check your owner’s manual for model-specific instructions.
If the opener is mounted high, the battery compartment is hard to access, or anything looks damaged, it is a smart time to call a garage door professional. No shame in keeping all fingers, ladders, and garage doors exactly where they belong.
How to Change the Backup Battery in a LiftMaster Garage Door Opener
- Identify the Battery Type: Start by checking your opener model number or owner’s manual. Many LiftMaster garage door openers with integrated battery backup use a 12V rechargeable battery, but the exact replacement depends on the model. Note: Do not guess based only on appearance. A battery may look similar but still be the wrong fit for your opener.
- Locate the Battery Compartment: The battery compartment is usually located on the opener motor unit. On many overhead openers, it may be on the back or side of the unit. On some wall-mounted models, the compartment may be located differently.
- Remove the Battery Compartment Cover: Use the correct screwdriver to remove the battery cover or access panel. Keep the screws in a safe place, because garage screws love disappearing acts. Carefully remove the cover to expose the backup battery.
- Disconnect the Old Battery: Before removing the old battery, note the orientation of the positive (+) and negative (-) terminals. Disconnect the wires from the old battery. This may require gently pulling on the connectors or using a small tool to release them.
- Install the New Battery: Place the new battery into the compartment in the same orientation as the old one. Connect the wires to the correct terminals: red wire to positive and black wire to negative. Make sure the connections are secure, but do not force anything. A good connection should be firm, not wrestled into submission.
- Replace the Battery Compartment Cover: Reattach the cover to the battery compartment using the screws you set aside earlier. Tighten the screws securely to be sure the cover is properly in place.
- Reconnect the Power: Plug the opener back in or restore power at the circuit breaker. Give the opener time to recognize and charge the new battery. Some battery backup systems may need time to fully charge before they can properly support the opener during a power outage.
Testing the New Battery
After replacing the battery, test the opener in two stages.
First, test normal operation. Use the wall button or remote to open and close the garage door while the opener is connected to power. Make sure the door moves normally and that nothing sounds unusual.
Second, after the battery has had time to charge, you can briefly disconnect power to simulate an outage and test battery-backup operation. Operate the opener from a safe location and reconnect power afterward.
If the opener does not work on battery backup, double-check the battery connections, confirm the battery is compatible, and allow time for charging. If it still does not work, the issue may involve the battery, charging system, wiring, or opener itself.
What About LiftMaster Remote Batteries?
If your garage door opener works from the wall control but not from the handheld remote, the remote battery may be the problem.
Many LiftMaster remotes use a 3V CR2032 coin-cell battery, while some older remotes may use a different battery type. Open the remote carefully, check the existing battery, replace it with the same type, and make sure the positive and negative sides are positioned correctly.
In most cases, changing a remote battery does not erase the programming. If the remote still does not work after a fresh battery, it may need to be reprogrammed or inspected for damage.
What About LiftMaster Wireless Keypad Batteries?
If your outside keypad is not responding, has weak lights, or only works sometimes, the battery may be ready for retirement.
Most LiftMaster wireless keypads use a 9V alkaline battery, though older models can vary. Check the model number or owner’s manual before replacing it.
Ensure safety: Stand clear of the door while testing the keypad, and keep people and pets away from the garage door area. Let anyone nearby know you are testing the keypad so no one walks under or near the moving door.
Check your LiftMaster’s model to identify the type of keypad, then follow the instruction manual for that model. Here are the common keypad battery replacement styles:
- Slide-Cover Keypads: For some models, you can slide the battery cover down, disconnect the old 9V battery from the power leads, connect the new battery, tuck it back into the housing, and slide the cover back into place.
- Keypads With a Top Oval Cutout: Some models have an oval cutout near the top of the battery cover. Insert a flat-head screwdriver into the cutout, apply gentle pressure, slide the cover down, replace the old 9V alkaline battery, and slide the cover back up until it locks.
- Older Screw-Cover Keypads: Some older keypad models have a screw at the bottom of the cover. Remove the screw with a Phillips screwdriver, slide the cover down, replace the 9V alkaline battery, then reinstall the cover and screw.
- Pin-Hole Style Keypads: For pin-hole style keypad covers, insert a small screwdriver into the pin hole, gently pull outward while sliding the cover down, replace the battery with a new 9V alkaline battery, then slide the cover back into place. Use a high-quality alkaline battery, avoid mixing old and new batteries, and dispose of used batteries according to your local guidelines.
Check for additional maintenance needs: While you have the wireless keypad open, take the opportunity to inspect it for any signs of wear or damage. Check the battery contacts for corrosion, and clean them if necessary. This guarantees good contact and reliable operation once the new battery is installed.
Consider the age of your wireless keypad: If your wireless keypad is very old, it might be worth considering whether it needs to be replaced entirely rather than just changing the battery. Over time, components can wear out, and replacing the entire unit may provide better reliability and functionality.
Reprogramming the keypad: Most keypad battery changes do not require reprogramming. If the wireless keypad still does not work after replacing the battery, reprogram it using the instructions for your specific LiftMaster keypad model.
How to Adjust a LiftMaster Garage Door Opener for Smooth Operation
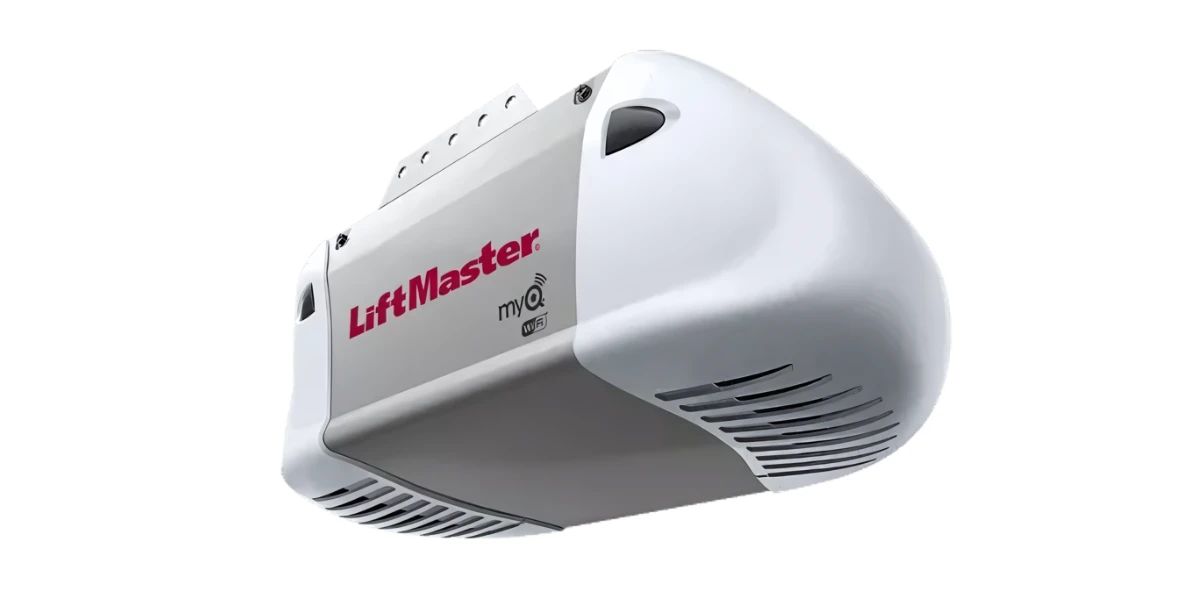
Before you start turning screws or pressing buttons, give your LiftMaster owner’s manual a quick look. Different LiftMaster openers have different adjustment styles. Some older LiftMaster units use manual UP/DOWN travel screws and force controls, while newer Security+ 2.0 and myQ-enabled models may use electronic programming buttons instead.
In other words, your opener may not follow the same playbook as your neighbor’s. Garage doors like to keep things interesting. Check your model first, so you adjust the right setting, avoid accidental over-adjusting, and keep the door operating safely.
Before You Adjust Anything
Start with the owner’s manual for your specific LiftMaster model. If you do not have the printed copy, you can usually look it up by model number through LiftMaster or Chamberlain support. You may need:
- A sturdy ladder
- A screwdriver, if your opener uses manual adjustment screws
- A flashlight
- Your opener model number
- A clear garage door area
- A little patience, because garage doors can be dramatic
Before touching the opener settings, check the garage door itself. Disconnect the opener using the emergency release only when the door is fully closed, then carefully lift the door by hand. It should move smoothly and feel reasonably balanced.
If the door feels heavy, sticks, slams shut, or will not stay partly open, the problem is likely with the door system—not the opener. That is a good time to call a garage door professional before your opener gets blamed for doing its best.
Understanding Travel and Force Adjustment Controls
Before you adjust your LiftMaster opener, it helps to know what the controls actually do. Just remember: not every LiftMaster opener uses the same setup. Some models have manual adjustment screws, while newer Security+ 2.0 and myQ-enabled models may use electronic programming buttons.
- Travel Limits: These tell the opener where the garage door should stop when opening and closing. If the door stops too soon, does not close all the way, or hits the floor and reverses, the travel limits may need attention.
- UP and DOWN Travel Controls: On many manual adjustment screw models, the UP control changes how far the door opens, while the DOWN control changes how far the door closes. Make small changes and test the door after each adjustment. Tiny turns, goat-sized patience.
- Force Controls: These control how much power the opener uses to move the door. Force should never be used to push through a stuck, binding, or unbalanced garage door. If the door is fighting the opener, something else needs fixing first.
- Electronic Programming Buttons: Some newer LiftMaster openers do not use simple travel screws. They may use buttons or arrows to set the open and close positions. For those models, follow the exact steps in your owner’s manual.
After any travel or force adjustment, test the safety reversal system. The door should reverse when it touches a 2×4 laid flat on the floor. If it does not reverse, stop using the opener and call a professional.
Setting Travel Limits for Your Garage Door
One of the first adjustments you might need to make is setting the travel limits. This makes sure your garage door opens and closes properly.
Adjusting the Down Travel
If your garage door does not close all the way, the down travel may need to be increased. On many LiftMaster openers with manual adjustment screws, turning the DOWN travel screw counterclockwise increases the down travel. One full turn commonly equals about 2 inches of door travel.
If the garage door closes, touches the floor, and then reverses, the down travel may be set too far. In that case, decrease the down travel slightly. Make small adjustments, then test the door. Do not keep cranking away like you are opening a pickle jar. Tiny adjustments are your friend.
Adjusting the Up Travel
If your garage door does not open far enough, the up travel may need to be increased. On many manual adjustment screw models, turning the UP travel screw clockwise increases the up travel. Again, one full turn commonly equals about 2 inches of travel.
Adjust a little, test, and repeat if needed. The door should open high enough for your vehicle without over-traveling or straining the opener.
What About Newer LiftMaster Openers?
If your LiftMaster opener has electronic travel programming buttons instead of visible UP/DOWN adjustment screws, do not follow screw-based instructions. Newer Security+ 2.0 and myQ-enabled models often use buttons or arrows to set the open and close positions.
For those models, follow the exact travel programming steps in your owner’s manual. The buttons may look simple, but the sequence matters. Garage doors are not big fans of freestyle button pressing.
Force Adjustment Basics
Force settings control how much power the opener uses to move the garage door. This is where we need to be extra careful.
Never use force adjustments to make a stuck, binding, or unbalanced garage door move. The opener is designed to move a door that already works properly by hand. If the door is fighting the opener, something else needs attention. Before increasing force, check for:
- Blocked or misaligned safety sensors
- Dirty or damaged tracks
- Worn rollers
- Loose or damaged hardware
- A door that feels too heavy
- Broken or worn springs or cables
If springs or cables look damaged, stop there and call a professional. Those parts are under serious tension, and they are not the place for a “let’s see what happens” afternoon.
Adjusting the Closing Force
Closing force controls how much power the opener uses when lowering the garage door. Before adjusting it, check for:
- Blocked or misaligned safety sensors
- Dirty or damaged tracks
- Worn rollers
- A sticking or unbalanced garage door
- Broken or worn springs or cables
If your LiftMaster opener has manual force adjustment screws:
- Find the DOWN or CLOSE force control on the motor unit.
- Make a small adjustment.
- Test the door after each change.
- Use only the minimum force needed for smooth operation.
If the door pushes too hard, is difficult to stop, or does not reverse properly, reduce the closing force and stop using the opener until the safety reversal system works correctly.
Adjusting the Opening Force
Opening force controls how much power the opener uses when lifting the garage door. Before adjusting it, check whether the door:
- Feels heavy by hand
- Sticks while opening
- Stops partway up
- Has worn rollers, springs, cables, or track issues
If your opener has manual force adjustment screws:
- Find the UP or OPEN force control on the motor unit.
- Make a small adjustment.
- Test the door after each change.
- Do not keep increasing force to push through a problem.
The opener should lift a properly balanced garage door smoothly. If the door needs a lot of force to move, call a professional before things get goat-level stubborn.
Quick Troubleshooting Before Adjusting More
If your LiftMaster opener still is not running smoothly, check these before making more adjustments:
- Power: Make sure the opener is plugged in and receiving power.
- Safety sensors: Make sure both sensors are aligned, clean, and not blocked.
- Tracks: Clean dirt and debris from the tracks. Do not pack the tracks with grease.
- Moving parts: Lubricate the rollers, bearings, and hinges with a garage-door-safe lubricant.
- Remote batteries: If the opener works from the wall control but not the remote, the remote battery may be the problem.
- Opener mounting: Make sure the opener is secure and not shaking excessively during operation.
- Door balance: If the door is heavy or will not stay balanced by hand, stop adjusting the opener and have the door inspected.
Always Test the Safety Reversal System
After any travel or force adjustment, test the safety reversal system. Set a flat 2×4 board on the floor in the center of the door’s path. Close the door. When the door touches the board, it should reverse.
If the door does not reverse, stop using the opener and call a professional. A smooth garage door is great, but a safe garage door is the real win. Jolly Goat Garage Doors can inspect the sensors, travel settings, force settings, and door balance so your garage door works smoothly and safely—not just confidently loud.
Common Mistakes to Avoid
When adjusting your LiftMaster garage door opener, avoid these garage-door “oops” moments:
- Adjusting force before checking the door balance
- Using force settings to push through a stuck door
- Over-adjusting travel or force controls
- Making large travel adjustments all at once
- Lubricating the tracks instead of cleaning them
- Trying to replace springs or cables yourself
- Assuming every LiftMaster opener adjusts the same way
- Ignoring safety features like auto-reverse—make sure these features are working correctly to prevent accidents
- Skipping regular maintenance
Simple Maintenance Tips to Help Your LiftMaster Opener Last Longer

A little garage door TLC can go a long way. Your LiftMaster opener works hard through daily use, summer storms, power surges, and the occasional “why is that blinking?” moment. A quick check now and then can help prevent common LiftMaster problems before they turn into a bigger repair. Here are a few goat-approved maintenance habits:
- Watch and listen while the door moves. If the motor runs but the door does not move, the trolley may be disconnected, the red emergency release cord may have been pulled, or there may be too much resistance in the door system.
- Check the power source first. Some LiftMaster problems are really power issues. Make sure the opener is plugged in and check for a tripped circuit breaker before assuming you need a new opener.
- Look for blinking lights or light codes. A blinking LED light, blinking light codes, or unusual sensor lights can help point you toward the problem. These light codes may point to sensor issues, sensor misalignment, sensor wires, travel problems, or other opener diagnostics.
- Keep the safety sensors clean. Wipe the sensor lenses with a soft, dry cloth and clear away spider webs, dust, and obvious obstructions. Many closing problems start with something simple blocking or confusing the sensors.
- Clean the tracks, but do not grease them. Dirt and debris can make the door harder to move. Wipe the tracks clean, but save the lubricant for the right parts.
- Lubricate moving parts. Use a garage-door-safe lubricant on rollers, hinges, and bearings. Smooth parts make life easier for the opener, especially on a single garage door that gets used every day.
- Test the door manually. With the door fully closed, disconnect the opener using the red emergency release cord, then carefully lift the door manually. If it feels heavy, sticks, or will not stay partly open, stop there and call a professional.
- Do not mess with broken springs or cables. Garage door springs are under extreme tension and can cause serious injury. If you see broken springs, frayed cables, or loose hardware, let a trained repair technician handle it.
- Check your remote, keypad, and myQ app. If the wall control works but the remote, keypad, or myQ app does not, the opener itself may be fine. Fresh batteries, reprogramming, or Wi-Fi troubleshooting may solve the issue.
Think of maintenance like giving your garage door opener a little pep talk and a clean workspace. Most LiftMaster problems are easier to handle when you catch them early—and most people would rather do a five-minute check today than deal with a stubborn garage door tomorrow.
If your quick maintenance check turns up grinding noises, blinking lights, a heavy door, or anything that feels off, Jolly Goat Garage Doors can take it from there. We’ll inspect the opener and the door system, find the real issue, and help keep your LiftMaster running without the garage-door guessing game.
When to Call a Jolly Professional
Some LiftMaster fixes are simple, but not every garage door problem should become a weekend wrestling match. Call Jolly Goat Garage Doors if:
- The door feels heavy, sticks, slams shut, or will not stay balanced by hand.
- The opener keeps reversing even after checking the sensors and travel settings.
- The safety reversal system does not work properly.
- Springs, cables, rollers, or tracks look damaged or worn.
- The opener makes grinding, shaking, or unusual noises.
- The remote, keypad, battery, or HomeLink still will not work after basic troubleshooting.
- You are not sure which LiftMaster model, remote, keypad, or setting you are working with.
A garage door opener is supposed to help the door move—not fight it into submission. If the system feels unsafe, stubborn, or confusing, it is better to bring in a pro before things get goat-level dramatic.
Need Help With Your LiftMaster Opener?
If your LiftMaster opener is still acting up, Jolly Goat Garage Doors is ready to help. Whether you need remote programming, keypad troubleshooting, battery replacement, HomeLink setup, opener adjustment, or a full garage door inspection, our team can get your system back to smooth, safe operation. Give us a call today at 405-792-0042, and let’s get your garage door behaving like the helpful little workhorse it was meant to be.